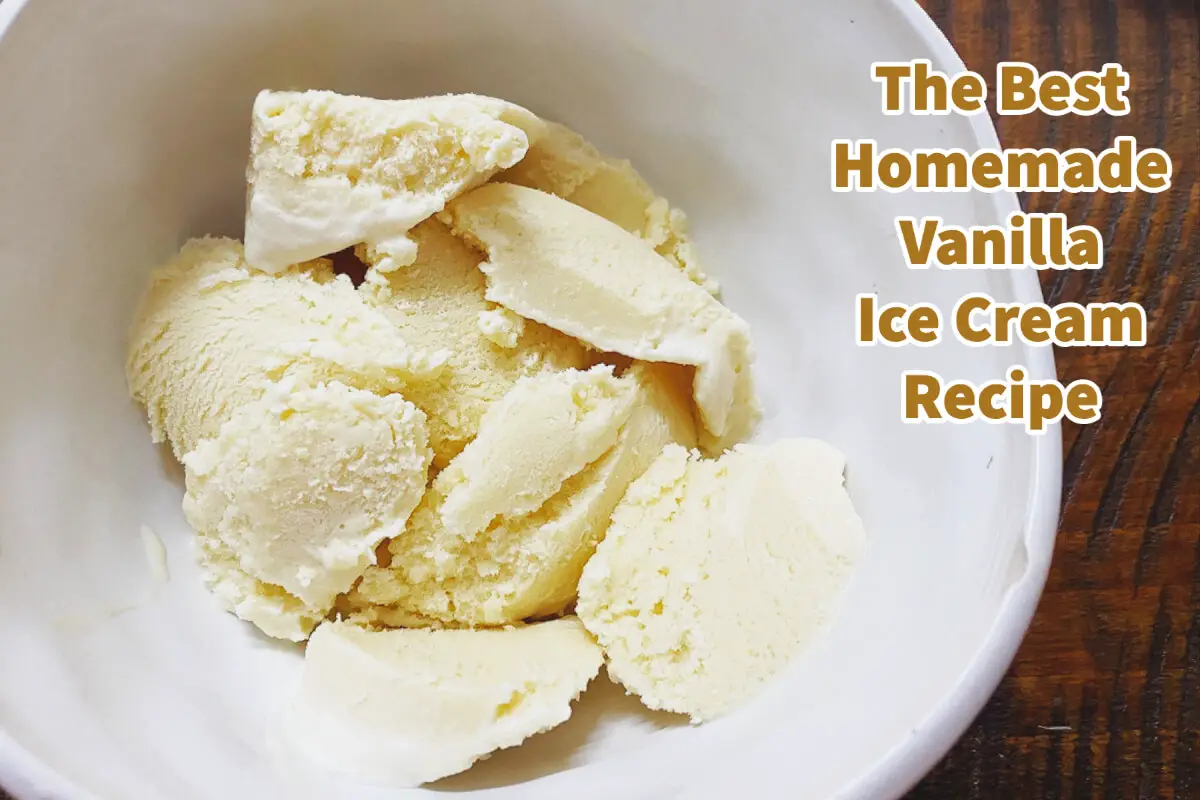
It’s fantastic that you’ve taken the initiative to make your ice cream! We love to make our homemade ice cream, and this recipe is one of the best vanilla ice creams you will ever make,
Homemade vanilla ice cream is a classic favorite, and using a reliable ice cream maker like the Cuisinart ensures you get the best texture and consistency. Your reasons are spot on; many people feel the same about homemade products, not just ice cream.
Table of Contents
- The Art Of Making Vanilla Ice Cream: Key Ingredients And Tips To Remember
- The Best Homemade Vanilla Ice Cream Recipe
The Art Of Making Vanilla Ice Cream: Key Ingredients And Tips To Remember
Ah, vanilla ice cream – the quintessential flavor that has been enjoyed by many, young and old, for generations. Its delicate flavor, creamy texture, and pure simplicity allow it to stand alone as a dessert favorite or play well with countless toppings and pairings.

If you’ve decided to delve into homemade vanilla ice cream, you’re in for a delightful experience, but there are crucial steps and choices to remember. In this post, we’ll explore the importance of three significant elements when crafting the perfect scoop: the quality of vanilla, the pasteurization of eggs, and the milk and cream choice.
The Core Of Your Ice Cream: Choose Quality Vanilla
Vanilla is not just a flavor; it’s an experience. The complexity and aroma that quality vanilla brings to ice cream are unmatched. When it comes to choosing vanilla, here’s what to remember:
Vanilla Beans Vs. Vanilla Extract:
- Vanilla Beans: They are the most authentic source of vanilla flavor. When you split the bean, you’ll find thousands of tiny seeds that contain the flavor essence. Using vanilla beans gives the ice cream a stronger, nuanced flavor and iconic speckled appearance.
- Vanilla Extract: Ensure you use pure vanilla extract, not imitation. The flavor payoff is significant, although it may be a bit pricey.
Store Your Vanilla Beans Properly:
If you’re using vanilla beans, store them in an airtight container in a cool, dark place. Avoid places where it might be exposed to high temperatures for vanilla extract.
The Importance Of Pasteurizing Eggs
Many traditional vanilla ice cream recipes call for eggs. They add a rich, creamy texture to the ice cream, turning the base into a custard. However, raw eggs can contain salmonella, which can cause food poisoning. Here’s where pasteurization comes into play.
What Is Pasteurization?
It’s a process that kills harmful bacteria by heating liquids to a specific temperature. Eggs are heated just enough to kill any bacteria without cooking the egg.
How To Pasteurize Eggs At Home
Pazeurizing your eggs at home is a straightforward process. And pasteurizing the eggs ensures that your ice cream will be safe for everyone to enjoy.
- Fill a saucepan with water and attach a cooking thermometer.
- Slowly heat the water until it reaches about 140°F (60°C).
- Gently place your eggs in the water, ensuring they are entirely submerged.
- Maintain the water temperature at 140°F (60°C) for 3 minutes.
- Remove the eggs and immediately place them in cold water to stop cooking.
Now, when you use these eggs in your ice cream mixture, you can be assured they are safe to consume.
Picking The Right Milk And Cream: Quality Matters
The body and soul of ice cream lie in the dairy. Here’s how to choose and why it matters:
Full Cream Milk:
Using whole-cream milk makes a substantial difference in texture and flavor. It adds richness and that mouthfeel we all adore in premium ice creams.
Fresh Cream:
The cream is what gives ice cream its luxurious mouthfeel. Look for fresh, high-quality cream if you can access a local dairy or farmers’ market; even better!
Avoid Additives:
Opt for products without added growth hormones or unnecessary additives when shopping for milk and cream. Simplicity and purity yield the best flavor.
Sugar Selection: The Sweet Backbone Of Your Ice Cream
Sugar doesn’t just sweeten the ice cream; it plays a pivotal role in its texture, mouthfeel, and capability. When it comes to vanilla ice cream, the sugar of choice for many traditional recipes is regular white table sugar. Here’s a breakdown:
Regular White Table Sugar:
Why It’s Preferred:
- Consistency: White sugar dissolves well in the mixture, ensuring a smooth texture without graininess.
- Neutral Flavor: White sugar doesn’t introduce any off-flavors. It’s all about enhancing the ice cream’s inherent flavors rather than adding a new one.
- Texture Benefits: Sugar influences the freezing point of the ice cream mixture. Proper sugar content ensures the ice cream remains scoopable without becoming too stiff or icy.
Proportion is Key:
While sugar is essential, it’s a balance game. Too much sugar can make the ice cream too soft, while too little may cause it to be hard and icy. For most vanilla ice cream recipes, the amount of sugar ranges from 3/4 cup to 1 cup for about 1 quart of ice cream. However, always be guided by your specific recipe and adjust to taste.
Experiment with Other Sugars:
For those looking to experiment, there are other sugar options like brown sugar, honey, or maple syrup. While these can offer a unique flavor profile, they can also impact the texture so that adjustments may be needed. However, regular white table sugar remains a favorite for classic vanilla ice cream.
Making vanilla ice cream at home is more than mixing and freezing ingredients. It’s an art, a labor of love. By ensuring you use the best quality vanilla, safely pasteurized eggs, and premium milk and cream, you’re well on your way to creating the most delightful, creamy, and flavorful vanilla ice cream you’ve ever tasted.
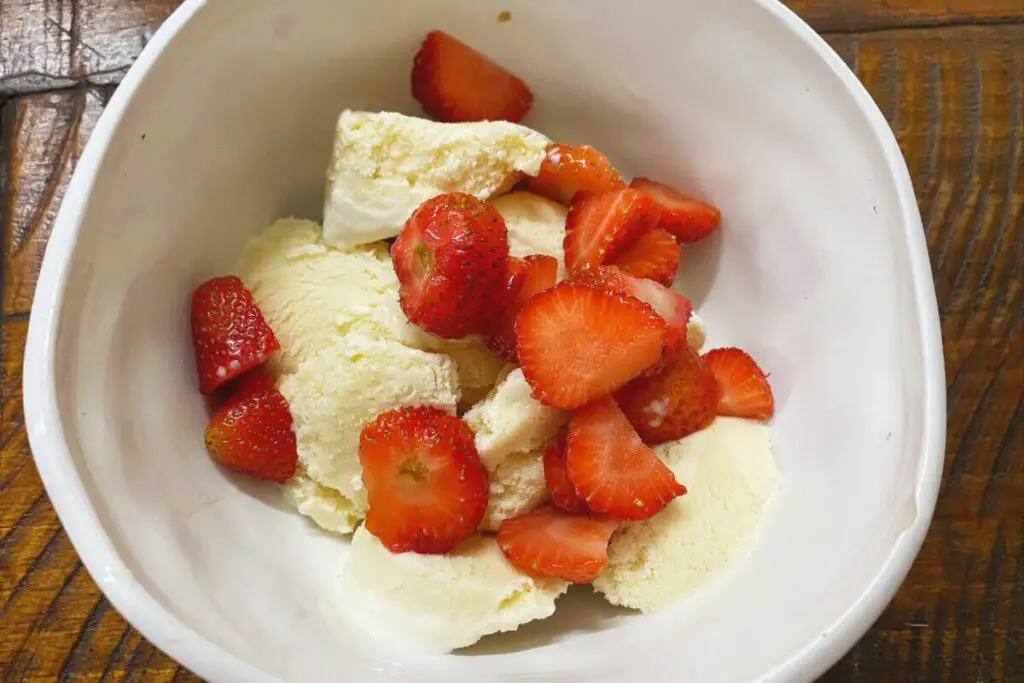
You can also add a strawberry to add a yummier and delicious taste!
The Best Homemade Vanilla Ice Cream Recipe
Homemade Vanilla Ice Cream
6
servings10
minutes20
minutes30
minutes“This vanilla ice cream recipe is both outstanding and straightforward. Once you’ve tried it, you’ll quickly see that it surpasses anything you can buy at the store.”
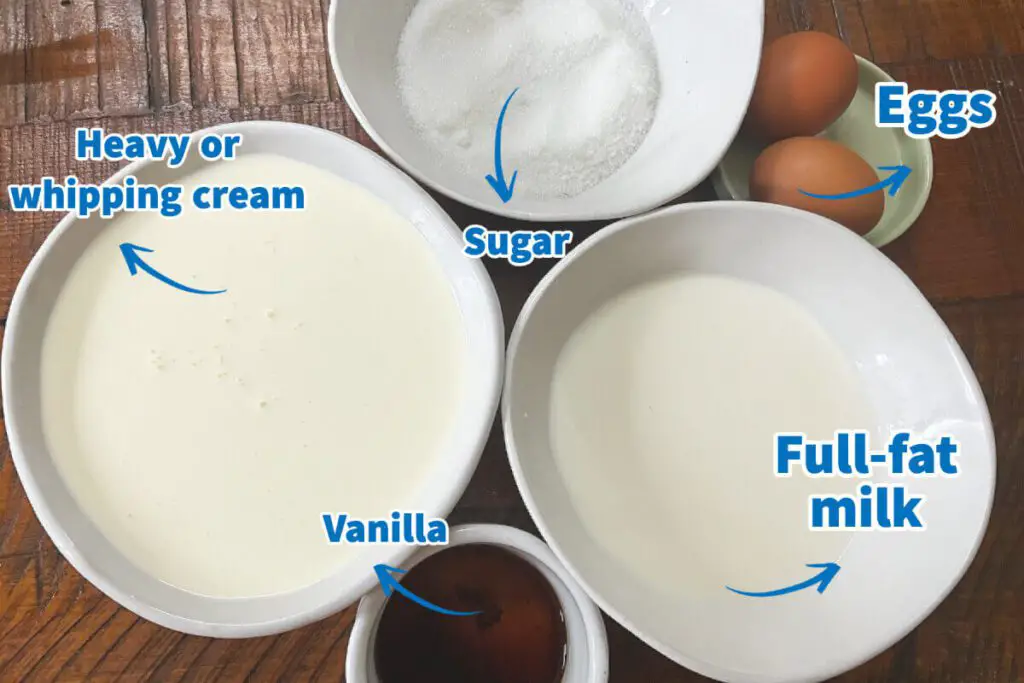
Ingredients
2 large eggs pasteurized (see notes)
3/4 cup sugar
2 cups heavy or whipping cream
1 cups full-fat milk
5 pcs strawberry (optional)
1 tbsp vanilla extract
Directions
- In a mixing bowl, whisk the eggs until they become light and fluffy. This process typically takes 1 to 2 minutes, depending on the whisking speed. Once the eggs reach a fluffy consistency, gradually add the sugar, whisking it a little at a time. Continue whisking until the sugar is completely blended into the eggs, creating a smooth and well-incorporated mixture. This step ensures that the sugar dissolves and combines evenly with the eggs, resulting in a delightful sweetness throughout the final creation.
- Whisk in milk and cream to the egg, vanilla, and sugar mixture. Gradually pour the milk and cream into the bowl while whisking continuously. The combination of milk and cream adds a creamy and rich texture to the mixture, enhancing its flavor and providing a luscious base for the final creation. Keep whisking until all the ingredients are well combined, ensuring a smooth and cohesive mixture. Adding milk and cream brings a delightful velvety consistency to the batter, setting the stage for a delicious treat.
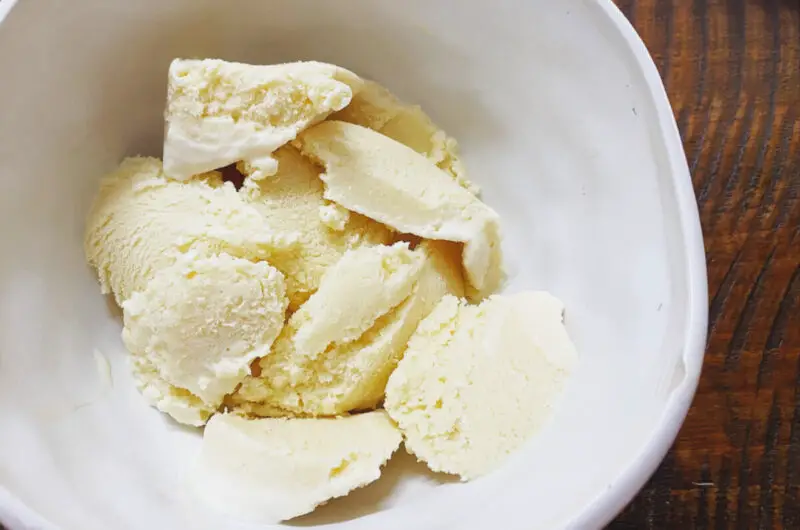
- Pour the prepared mixture into an ice cream maker and follow the manufacturer’s instructions. Turn on the ice cream maker and let it churn until it reaches a fully frozen consistency. The exact time may vary depending on your ice cream maker, but it typically takes 20-30 minutes. As the mixture churns, it will gradually freeze, creating a smooth and creamy ice cream texture. Once it reaches the desired consistency, it is ready to be enjoyed as a delightful frozen treat.
- To store the freshly made ice cream in the freezer, carefully transfer it to a plastic container with a tight-fitting lid. Ensure the container is suitable for freezing to maintain the quality of the ice cream. Smooth the surface of the ice cream to remove any air pockets and cover it with the lid. Place the container in the freezer and allow the ice cream to freeze completely. Depending on your desired firmness, this typically takes a few hours or overnight. Once fully frozen, your homemade ice cream will be ready to enjoy whenever you desire a cool and creamy treat.
Did you make this recipe?
Tag @a.bus.on.a.dusty.road on Instagram and hashtag it #LivingLifeAsAGlobalCitizen
Like this recipe?
Follow us @ABusOnADustyRoad on Pinterest
Did you make this recipe?
Follow us on Facebook

